How to Make Your Perfect Traveler’s Notebook Dashboards
Hi everyone, Elephant Erin back with a brand new post about my new obsession: Traveler’s notebook dashboards! Traveler’s notebooks are all the rage with the planner community. Having a notebook with my art journal, daily journal, and Bullet Journal all in the same place is what initially drew me to picking one up for myself. Something that comes along with using a travelers journal is personalizing and decorating it to make it true to who you are.
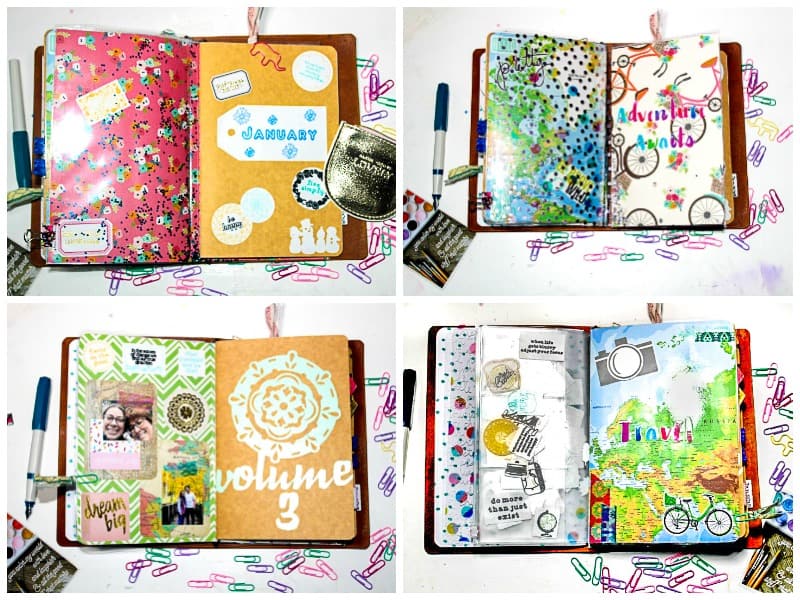
Dashboards are one of the easiest and fun ways to personalize your journal. It is basically a divider that will slip in behind your inserts that can be used for functionality and decoration. I have been experimenting with all different kinds of materials and tools in order to bring you the ultimate guide to creating your own traveler’s notebook dashboards!
First let’s talk about sizes: Traveler’s notebooks come in all different shapes and sizes. Chic Sparrow, a popular travelers notebook site has an awesome guide to figuring out the insert size that works best for each size notebook. Look at Chic Sparrow’s size chart here to determine what size your traveler’s notebook dashboards should be. I’m using an A5 size (same as the Leuchtturm1917), so I usually make my dashboards 1-2 inches smaller than the notebook itself. There is also always the options of tracing your inserts. Â
Supplies & How to Use Them
When it comes to materials you can use in your dashboard, the sky is the limit! Instead of giving you a laundry list of possible supplies (we would be here all day!), I’m going to show you a few of my dashboards and the materials I used to make them:
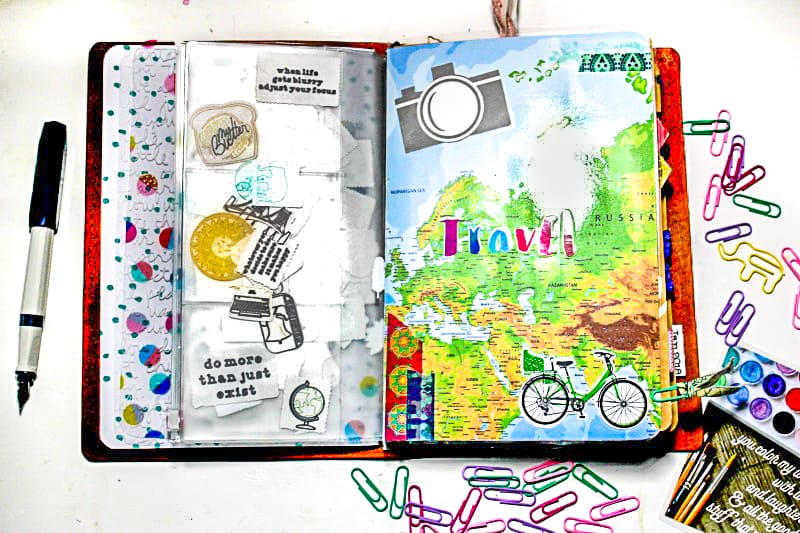
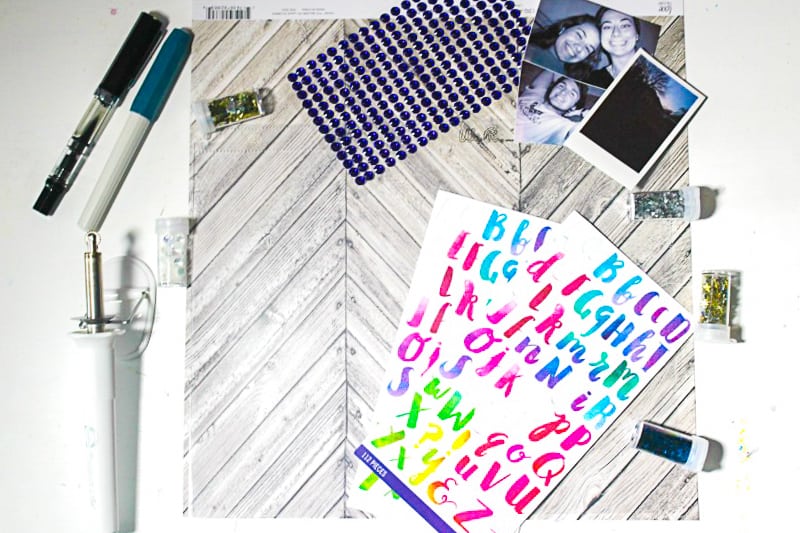
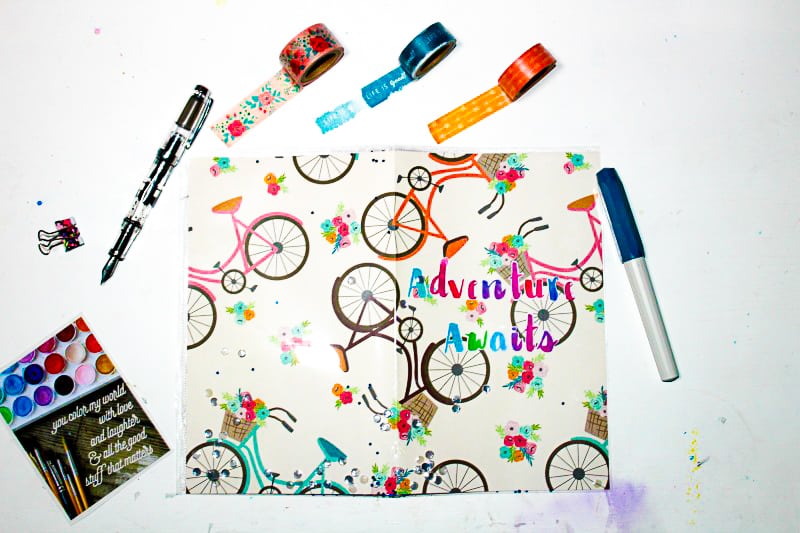
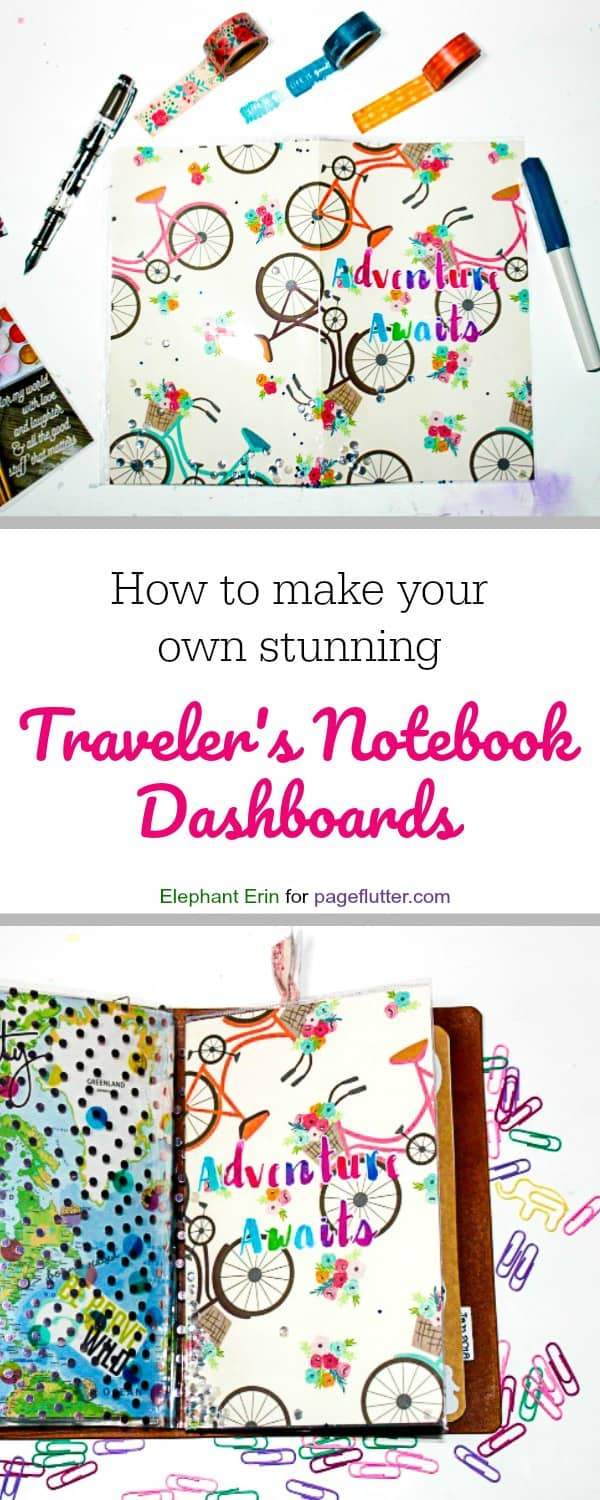
1. Patterned Dashboards (Cardstock paper or scrapbook paper)
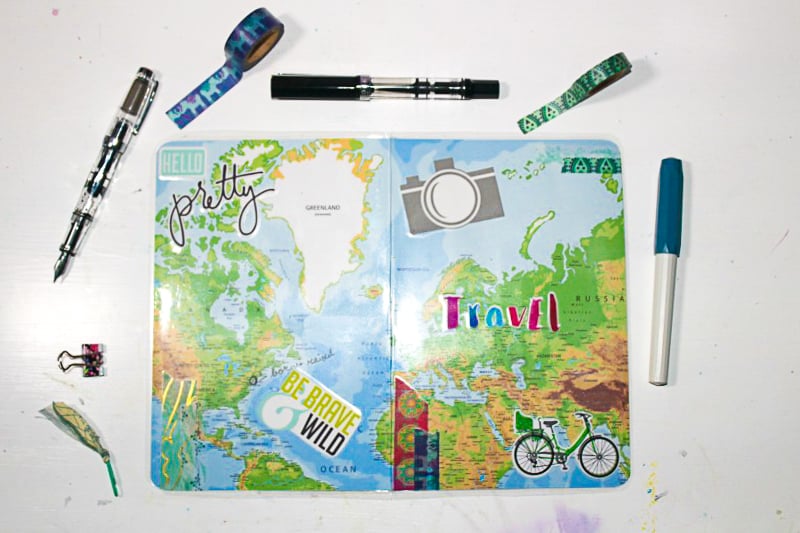
Scrapbooking papers top my list of absolute go-to materials. There are so many different patterns and images on them, and they sell them at craft stores, Target, and even Walmart. It’s also super fun to decorate them with pictures, stickers, or anything in your stash. I also recently picked up a laminator machine.  After I’ve created my dashboard design, I run the finished product through so it has extra durability. If you don’t have a laminator, you can also protect your dashboard with clear packing tape.
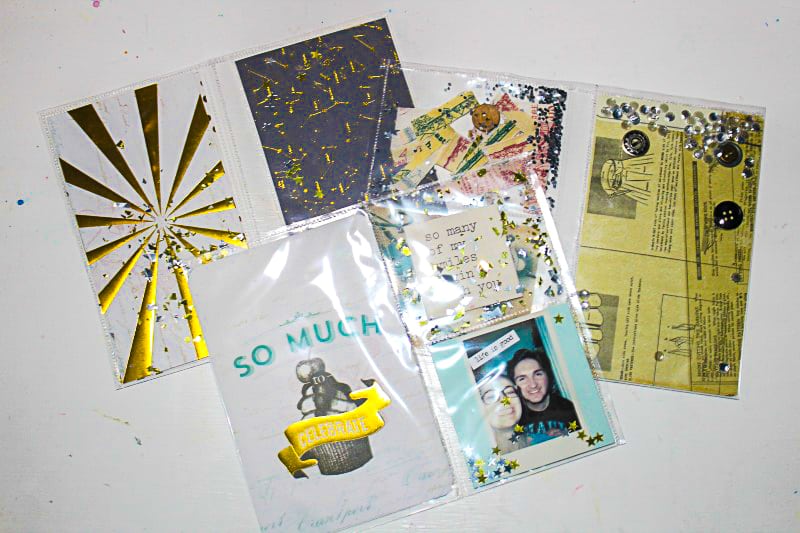
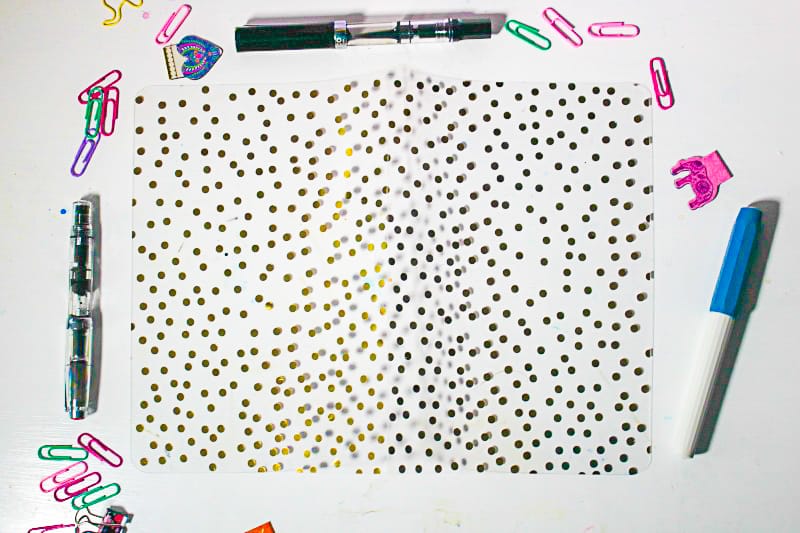
2. Â Clear and Layered Dashboards (Acetate)
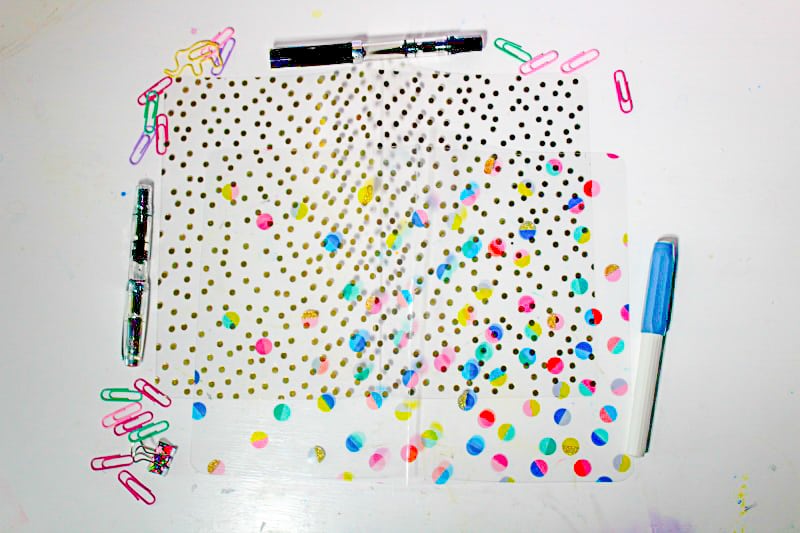
I love, love, LOVE this clear plastic material for dashboards. Just like scrapbooking paper, acetate sheets are available in different pattern. Since they’re clear, they’re really fun to layer in a traveler’s notebook. I picked mine up from Michaels and A.C. Moore. It works great on its own, so you don’t need to add any extras (unless you want to, of course). I highly recommend picking up a few sheets of this during your next craft shop trip!
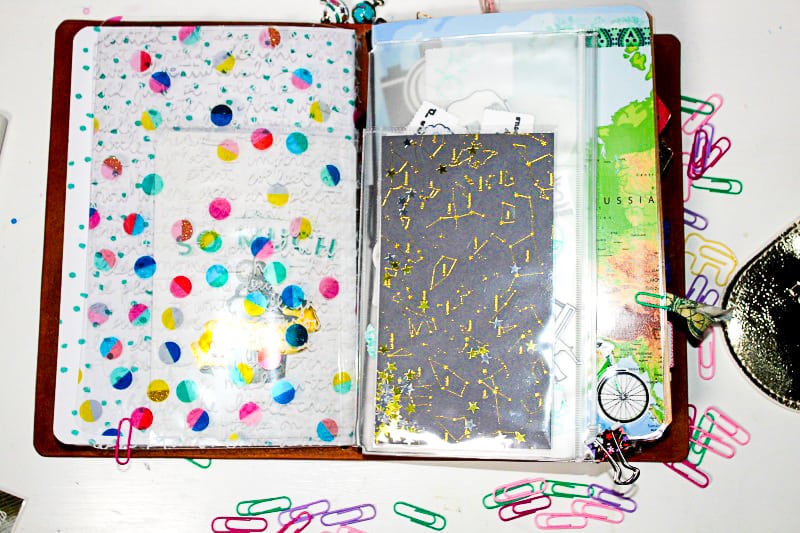
3. Shaker Dashboards (Project Life & We R Memory Keepers Pockets)
Shaker dashboards are one of my favorite ways to jazz up my planning. They’re similar to the other dashboards I’ve shown you, except they’re filled with photos, glitter, sequins, and other goodies! It’s so fun to see these flashy dashboards as you flip through your journal.
Here are a few materials I like using in my shaker dashboards. Don’t worry, I’ll explain how I use everything in a minute!
- Plastic photos sheets like Project Life or We R Memory Keepers
- Stickers for letters or decoration
- Glitter and confetti
- Double-sided scrapbooking paper
- Instant photos (a Fujifilm Instax Mini camera, or HP Sprocket photo printer can be especially handy for these projects)
- A Fuse tool
After watching a ton of videos about making dashboards using a Fuse tool, I just had to pick one up for myself. Get your glitter ready because using the Fuse tool means you can create your own shaker dashboards!Â
In the example above, I slipped a peice of two-sided scrapbooking paper inside an 8.5 x 11 Project Life pocket. Then I tossed in a few embellishments (I chose sequins and glitter) and sealed the end with the fuse tool. So easy!
Below are some smaller sized shaker dashboards I have been experimenting with. Just ensure that all sides are sealed with the fuse tool to keep the sequins and glitter in instead of all over the floor! Â
There you have it! There are all kinds of materials you can use to create beautiful dashboards for your travelers notebook. Personalize them to your loves and give your traveler’s notebook a pop of color. Enjoy!
Your turn to share! How do you use traveler’s notebook dashboards to organize your planning routine? Comment below with your favorite supplies and techniques to add life to your traveler’s notebook.


I haven’t used Traveler notebooks in the past, but… this post makes me want to jump right in. I’m not sure that’s a good thing as I am drowning in planners & notebooks as it is. ????????
Aren’t we all? LOL 😉
A travelers notebook is a great way to work through your stash, though! Just extra journals as inserts!
YES! When I first discovered travelers, I thought it meant leaving behind my old A5. So not true! They blend very easily. 🙂
Do I need a dashboard? Does the dashboard have a purpose like maybe to protect the books?
Unless you want to use dashboards, then no, they certainly aren’t required. Since they go inside the traveler cover, they really act more like dividers than protectors. Although, if you have sturdy laminated dashboards, they may add an extra layer of protection around your inserts, especially if you handle your notebook roughly. You could try one for fun. If it isn’t for you, you can always take it out! 🙂